[phpBB Debug] PHP Warning: in file [ROOT]/includes/bbcode.php on line 483: preg_replace(): The /e modifier is no longer supported, use preg_replace_callback instead
[phpBB Debug] PHP Warning: in file [ROOT]/includes/bbcode.php on line 483: preg_replace(): The /e modifier is no longer supported, use preg_replace_callback instead
[phpBB Debug] PHP Warning: in file [ROOT]/includes/bbcode.php on line 483: preg_replace(): The /e modifier is no longer supported, use preg_replace_callback instead
[phpBB Debug] PHP Warning: in file [ROOT]/includes/bbcode.php on line 483: preg_replace(): The /e modifier is no longer supported, use preg_replace_callback instead
[phpBB Debug] PHP Warning: in file [ROOT]/includes/bbcode.php on line 483: preg_replace(): The /e modifier is no longer supported, use preg_replace_callback instead
[phpBB Debug] PHP Warning: in file [ROOT]/includes/bbcode.php on line 483: preg_replace(): The /e modifier is no longer supported, use preg_replace_callback instead
[phpBB Debug] PHP Warning: in file [ROOT]/includes/bbcode.php on line 483: preg_replace(): The /e modifier is no longer supported, use preg_replace_callback instead
[phpBB Debug] PHP Warning: in file [ROOT]/includes/bbcode.php on line 483: preg_replace(): The /e modifier is no longer supported, use preg_replace_callback instead
[phpBB Debug] PHP Warning: in file [ROOT]/includes/bbcode.php on line 483: preg_replace(): The /e modifier is no longer supported, use preg_replace_callback instead
[phpBB Debug] PHP Warning: in file [ROOT]/includes/bbcode.php on line 483: preg_replace(): The /e modifier is no longer supported, use preg_replace_callback instead
[phpBB Debug] PHP Warning: in file [ROOT]/includes/bbcode.php on line 483: preg_replace(): The /e modifier is no longer supported, use preg_replace_callback instead
[phpBB Debug] PHP Warning: in file [ROOT]/includes/bbcode.php on line 483: preg_replace(): The /e modifier is no longer supported, use preg_replace_callback instead
[phpBB Debug] PHP Warning: in file [ROOT]/includes/bbcode.php on line 483: preg_replace(): The /e modifier is no longer supported, use preg_replace_callback instead
[phpBB Debug] PHP Warning: in file [ROOT]/includes/bbcode.php on line 483: preg_replace(): The /e modifier is no longer supported, use preg_replace_callback instead
[phpBB Debug] PHP Warning: in file [ROOT]/includes/bbcode.php on line 483: preg_replace(): The /e modifier is no longer supported, use preg_replace_callback instead
[phpBB Debug] PHP Warning: in file [ROOT]/includes/bbcode.php on line 483: preg_replace(): The /e modifier is no longer supported, use preg_replace_callback instead
[phpBB Debug] PHP Warning: in file [ROOT]/includes/bbcode.php on line 483: preg_replace(): The /e modifier is no longer supported, use preg_replace_callback instead
[phpBB Debug] PHP Warning: in file [ROOT]/includes/bbcode.php on line 483: preg_replace(): The /e modifier is no longer supported, use preg_replace_callback instead
[phpBB Debug] PHP Warning: in file [ROOT]/includes/bbcode.php on line 483: preg_replace(): The /e modifier is no longer supported, use preg_replace_callback instead
[phpBB Debug] PHP Warning: in file [ROOT]/includes/bbcode.php on line 483: preg_replace(): The /e modifier is no longer supported, use preg_replace_callback instead
[phpBB Debug] PHP Warning: in file [ROOT]/includes/bbcode.php on line 483: preg_replace(): The /e modifier is no longer supported, use preg_replace_callback instead
[phpBB Debug] PHP Warning: in file [ROOT]/includes/bbcode.php on line 483: preg_replace(): The /e modifier is no longer supported, use preg_replace_callback instead
[phpBB Debug] PHP Warning: in file [ROOT]/includes/bbcode.php on line 483: preg_replace(): The /e modifier is no longer supported, use preg_replace_callback instead
[phpBB Debug] PHP Warning: in file [ROOT]/includes/bbcode.php on line 483: preg_replace(): The /e modifier is no longer supported, use preg_replace_callback instead
[phpBB Debug] PHP Warning: in file [ROOT]/includes/bbcode.php on line 483: preg_replace(): The /e modifier is no longer supported, use preg_replace_callback instead
[phpBB Debug] PHP Warning: in file [ROOT]/includes/bbcode.php on line 483: preg_replace(): The /e modifier is no longer supported, use preg_replace_callback instead
[phpBB Debug] PHP Warning: in file [ROOT]/includes/functions.php on line 4752: Cannot modify header information - headers already sent by (output started at [ROOT]/includes/functions.php:3887)
[phpBB Debug] PHP Warning: in file [ROOT]/includes/functions.php on line 4754: Cannot modify header information - headers already sent by (output started at [ROOT]/includes/functions.php:3887)
[phpBB Debug] PHP Warning: in file [ROOT]/includes/functions.php on line 4755: Cannot modify header information - headers already sent by (output started at [ROOT]/includes/functions.php:3887)
[phpBB Debug] PHP Warning: in file [ROOT]/includes/functions.php on line 4756: Cannot modify header information - headers already sent by (output started at [ROOT]/includes/functions.php:3887)
OUPower.com • View topic - Spike's Truck Drum Waste Oil Heater

Spike's Truck Drum Waste Oil Heater

Looking to build your own machine shop equipment from scrap metal? Maybe interested in the "Gingery" designs and beyond... You've come to the right place.

Spike's Truck Drum Waste Oil Heater

Postby Dngspot » Tue Dec 28, 2010 10:03 pm

I have been able to get 800 deg from my Roger Sanders heater and want it a bit warmer. So I am giving it a go with a different design. It has cast iron drums and a better air intake than the Roger Sanders design, in my mind.

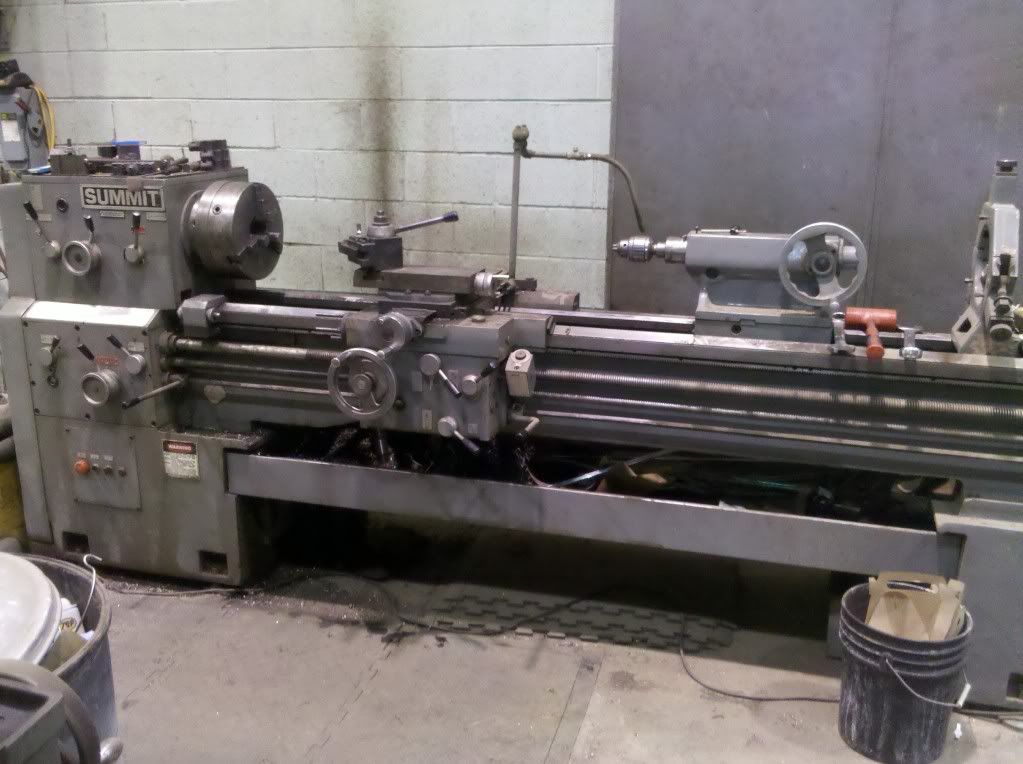
The first thing I did was obtain a couple of 16.5" brake drums from a large semi type truck. I put them on the lathe at work and machined the drums so the open edge of the drums would mate with each other.

Here is a pic of the lathe I used; it took about 2 hours to do both drums. It is also available to me during off hours at work.
Image

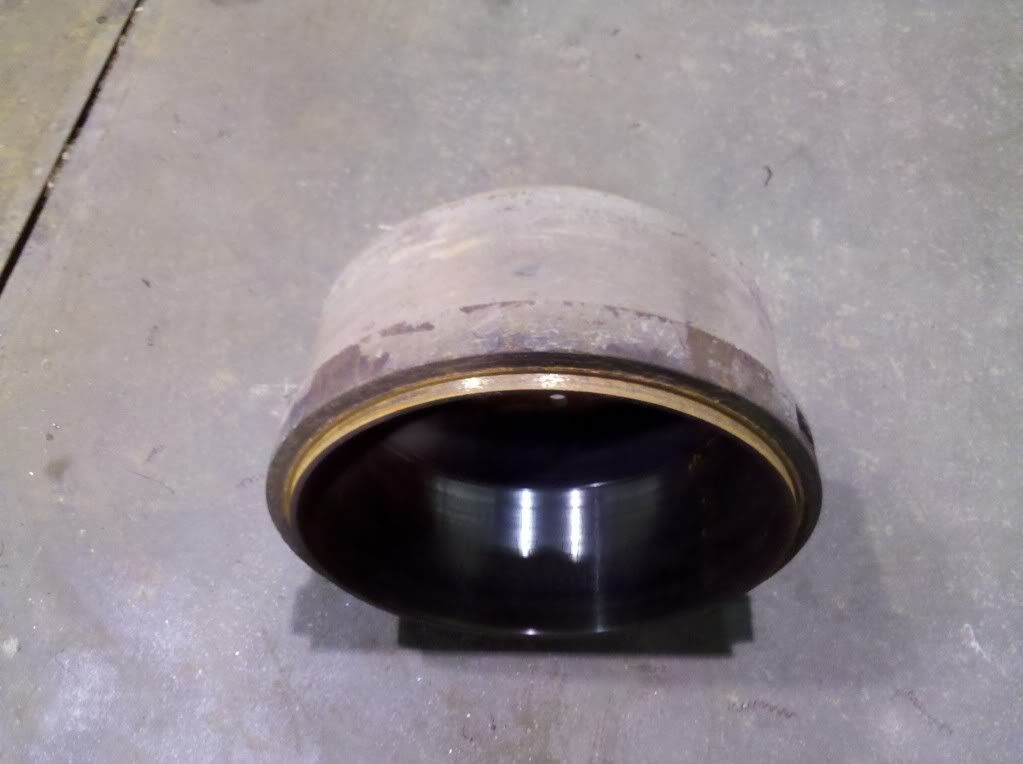
The drum edges, they are orange looking because of the fresh rust. I kept these in the back of my truck for a week while I gathered parts.

The outside cut on the bottom drum.
Image

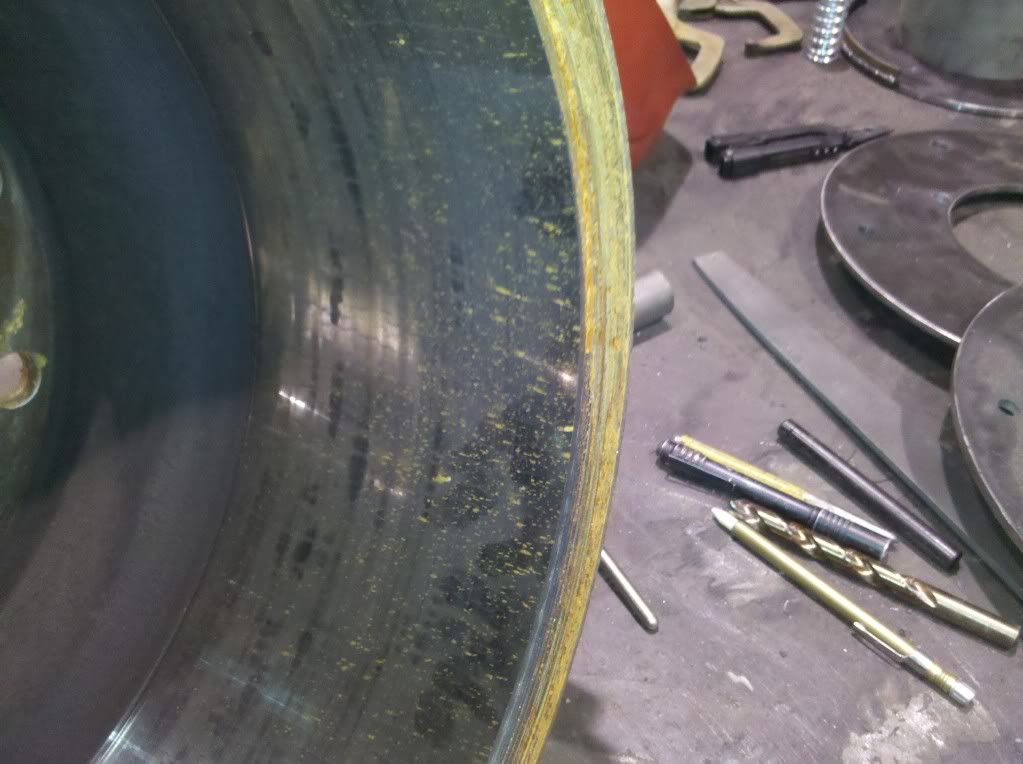
A close up of the inside cut on the top drum. Sorry for the pic quality.
Image

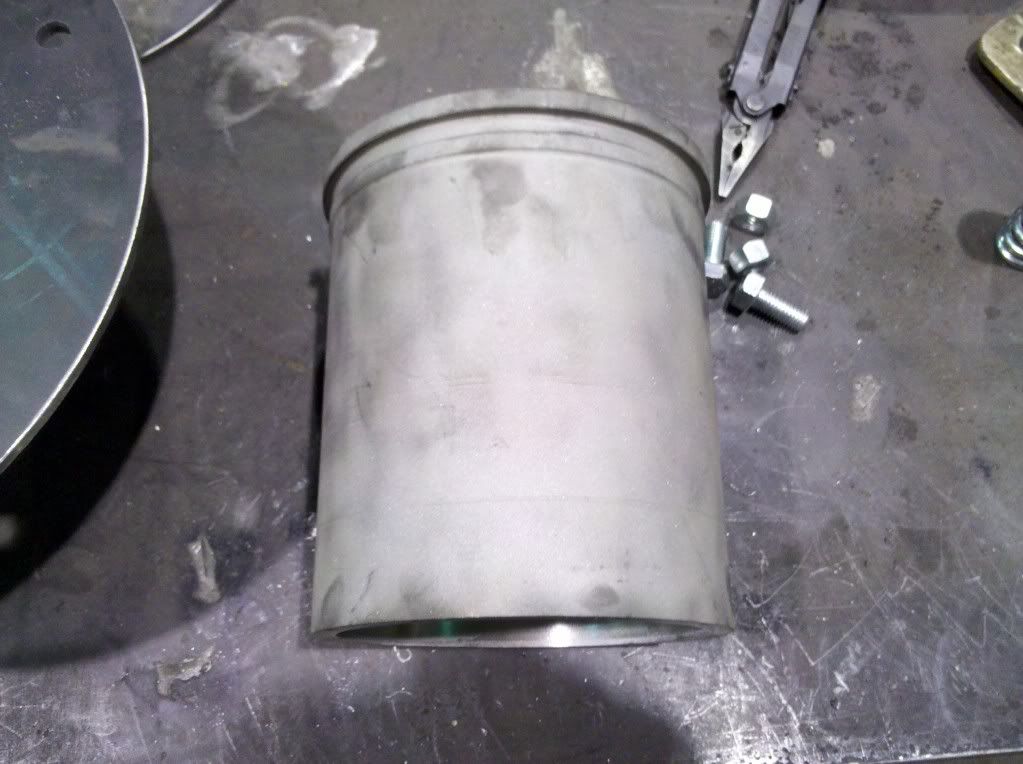
The cylinder after sandblasting and removing the bottom 2 inches, I believe it came from a C-15 Cat engine. I cut the bottom flat and inside of the cylinder with the lathe. I cut the inside of the cylinder about .020" because that area seems as hard as diamonds and does not drill well. The air vent holes will be in the lower 3" of the cylinder.
Image

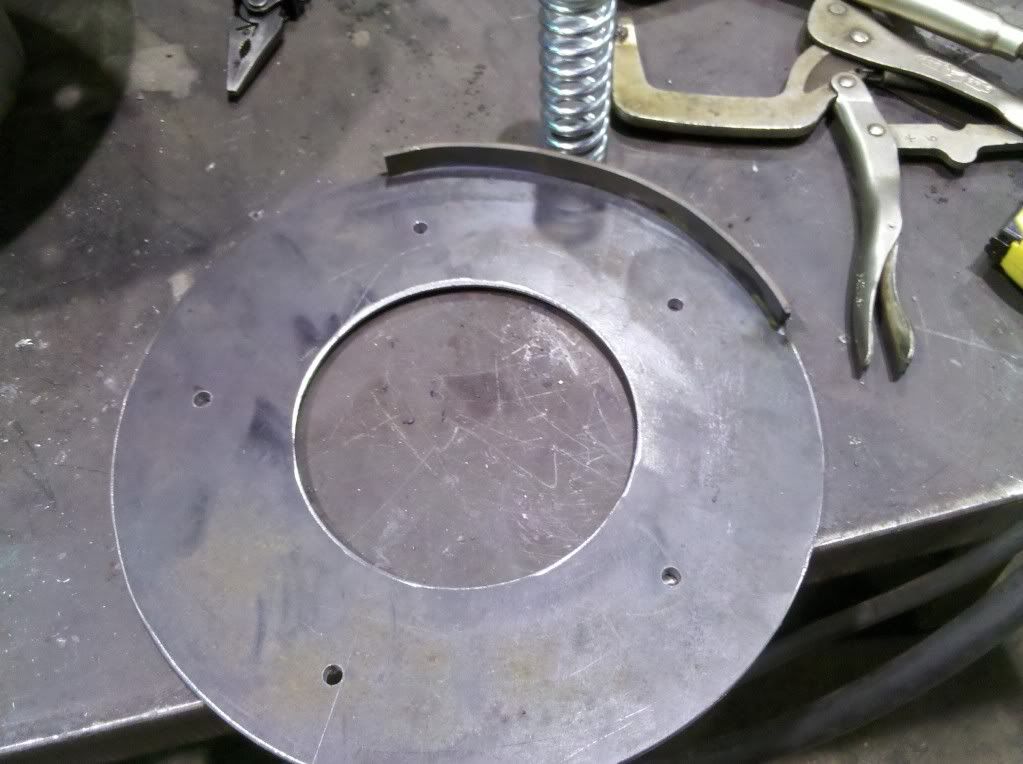
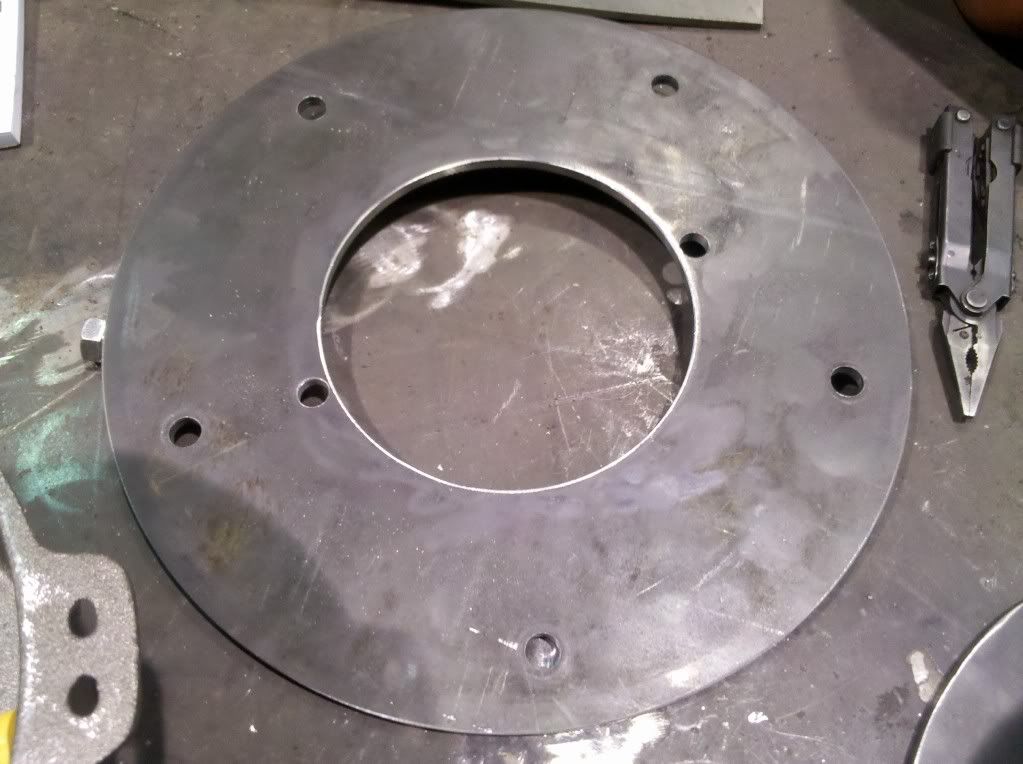
I cut 2 round plates to fit on the lug side of the brake drums. Both plates have 5- 1/2" holes for bolting. There are more holes, two for the bottom plate to fasten the cylinder to.
Image

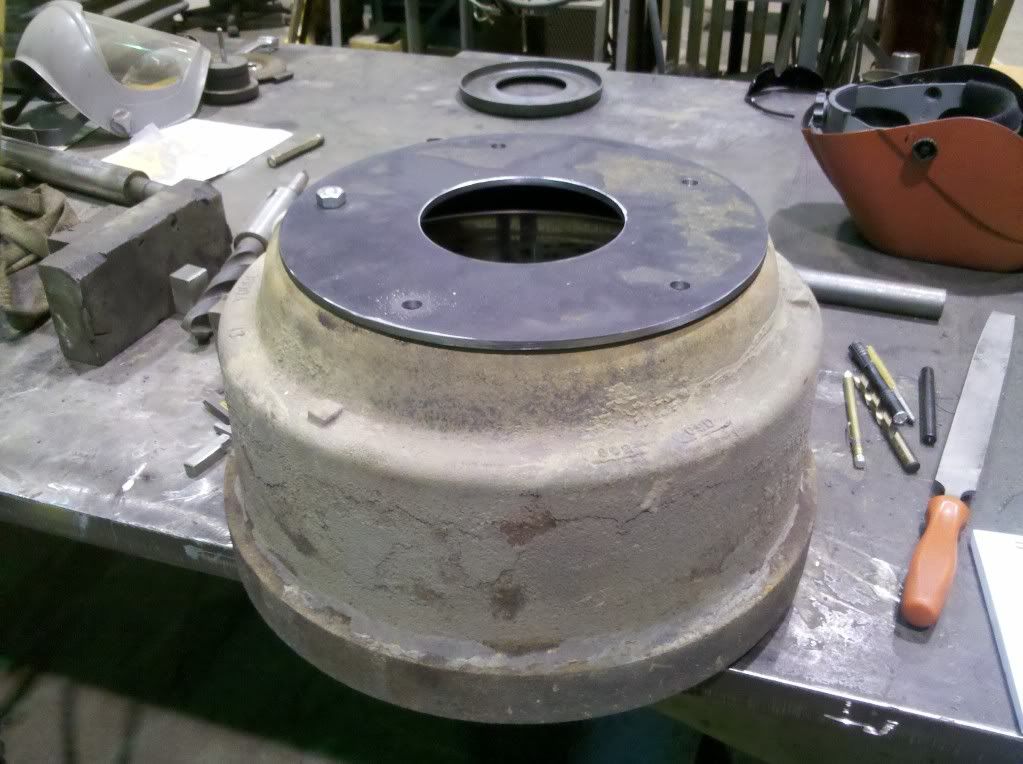
This pic shows the top drum with the second plate on top.
Image

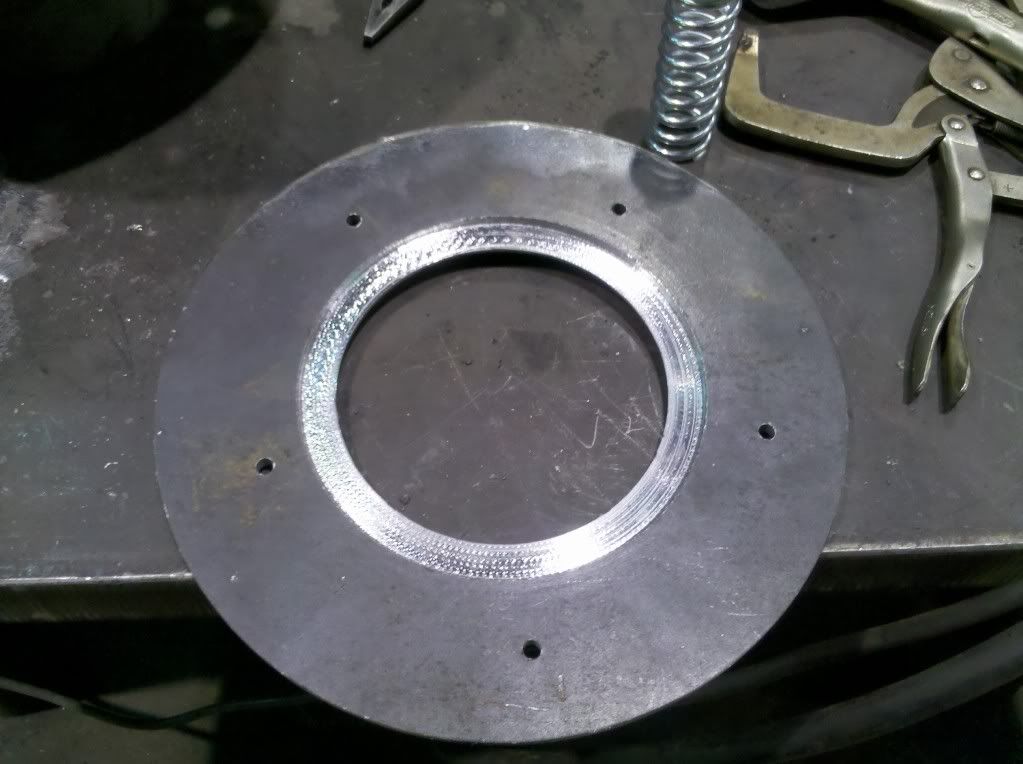
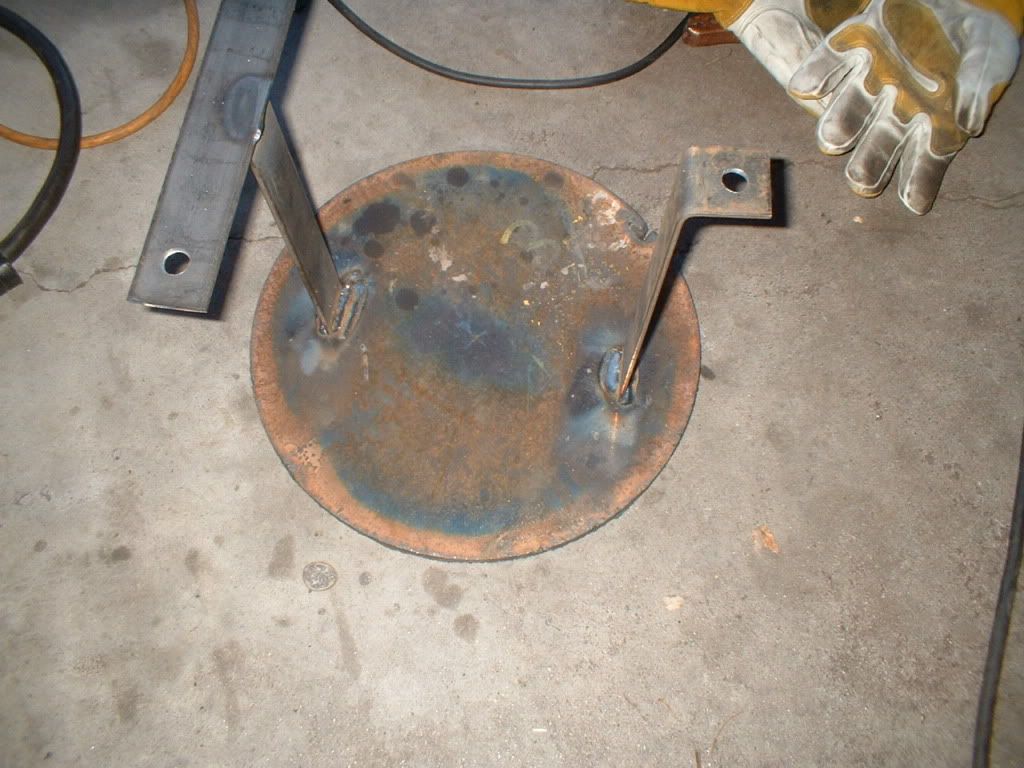
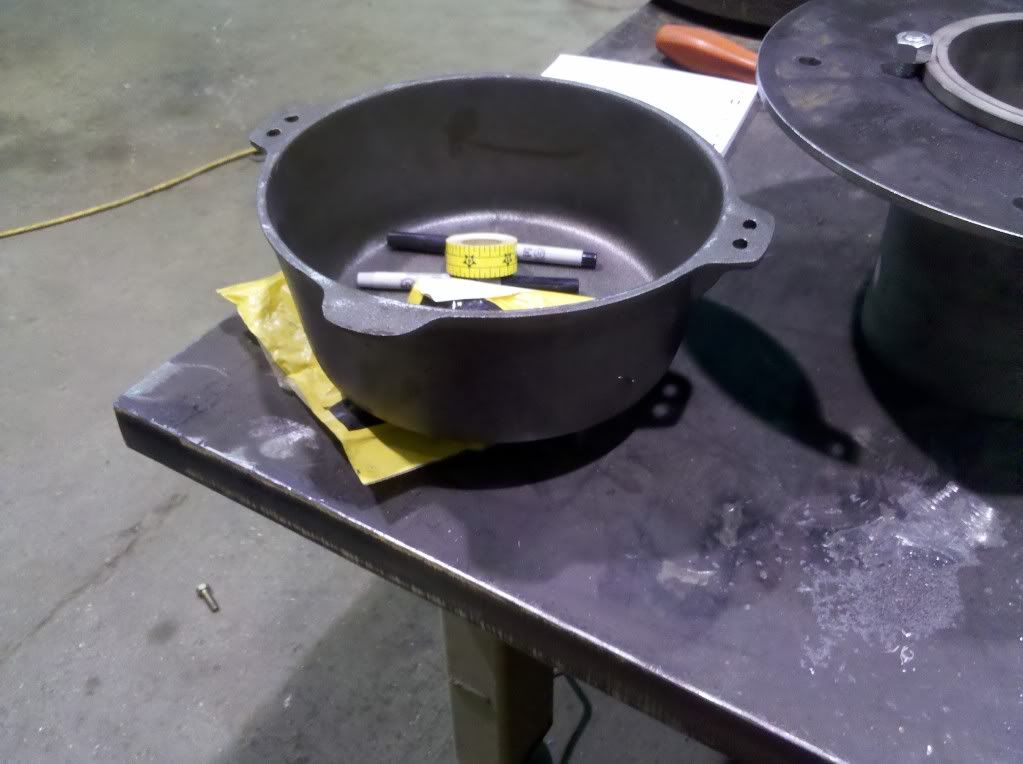
I cut another disk. It will set on top of the cast pot. The pot is the place the oil will drip into. The disk is machined so the cylinder will fit into it. The cylinder is about 6" O.D. The disk also has 5- 1/4" vent holes and a piece of steel welded to it, to help position the pot.

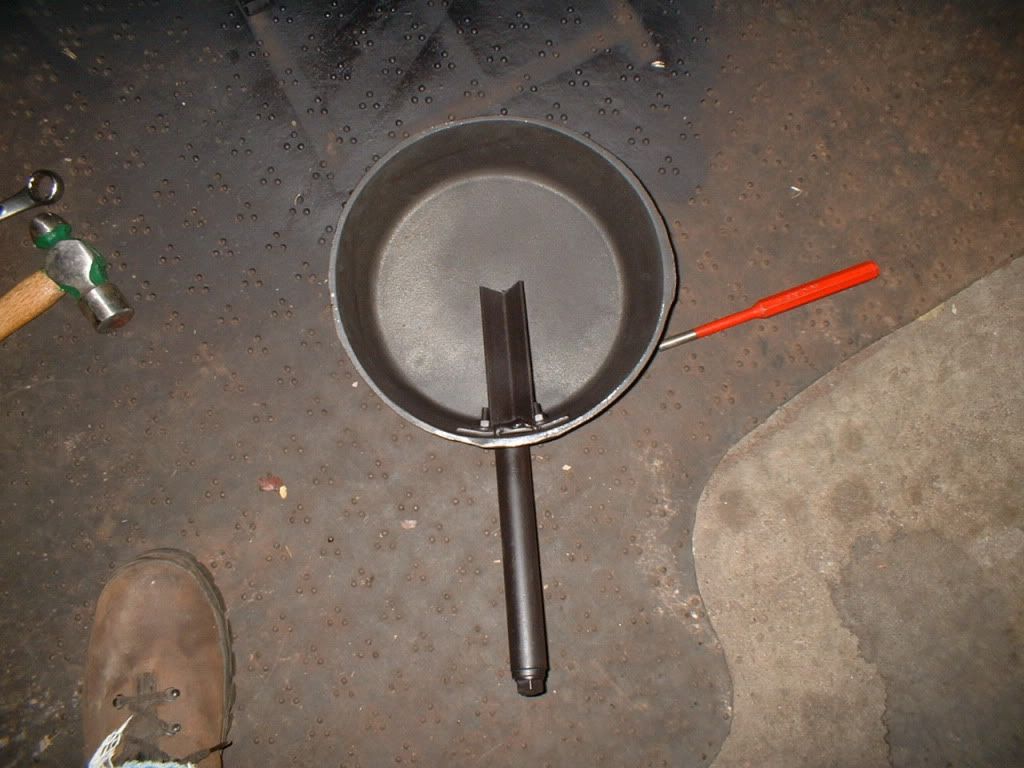
Here is the pot.
Image

The bottom of the disk

Image

... and the top of the disk.

Image

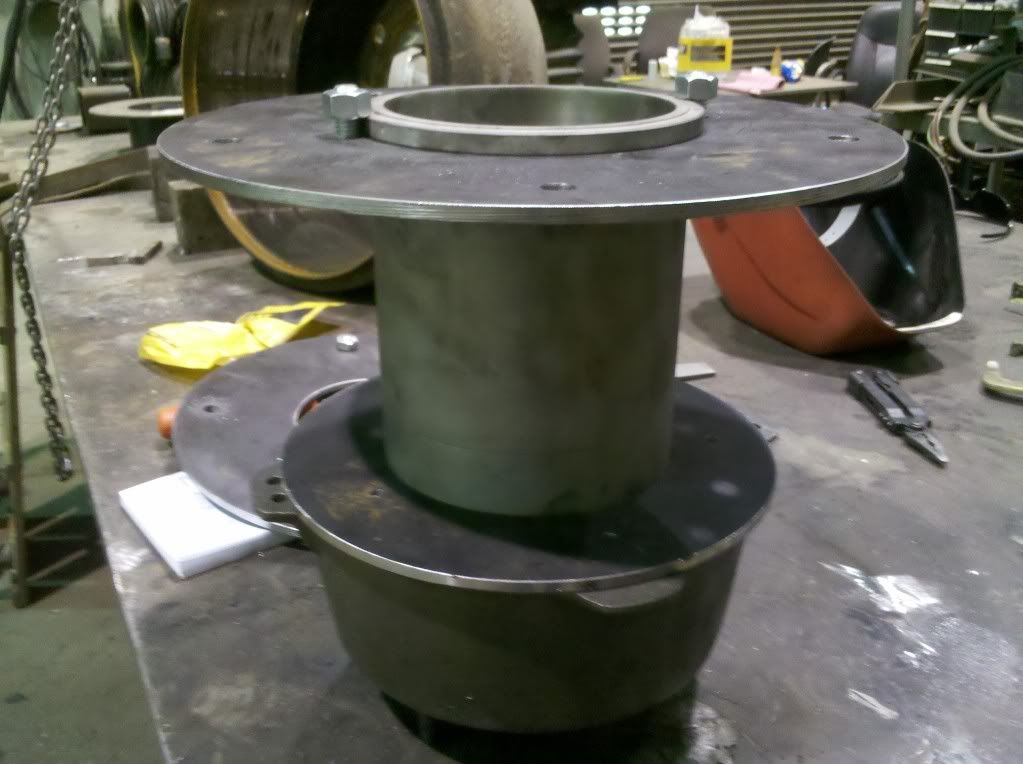
This is a pic of the burner assembly less the frame. The top plate will be bolted to the lower brake drum.
Image

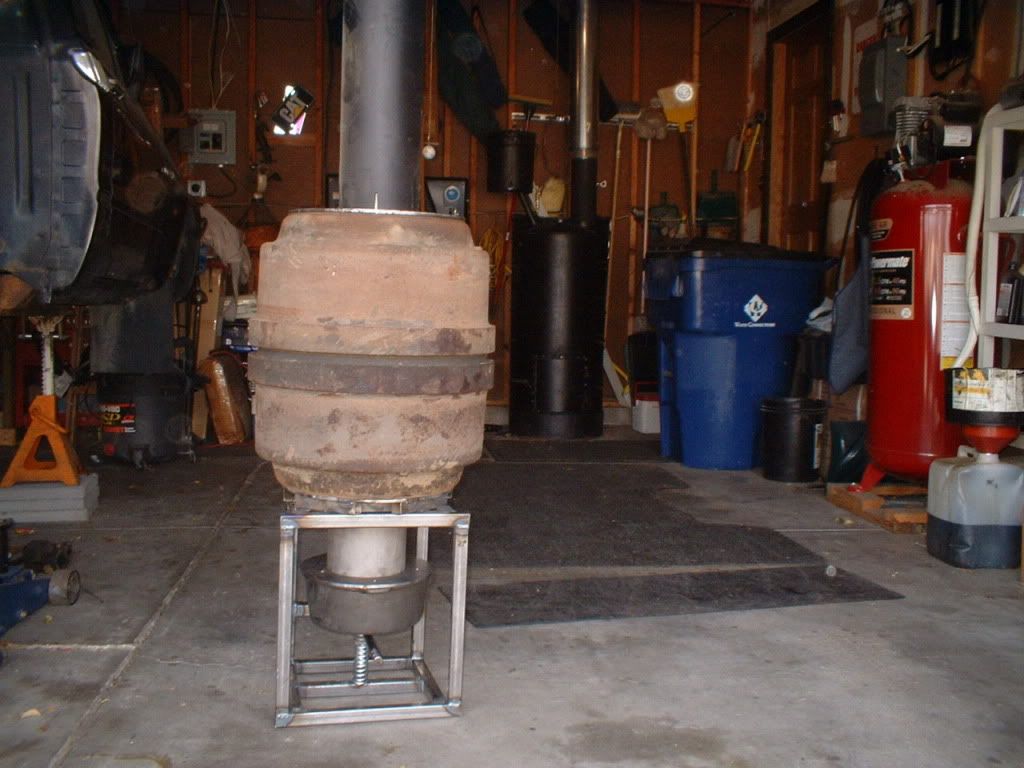
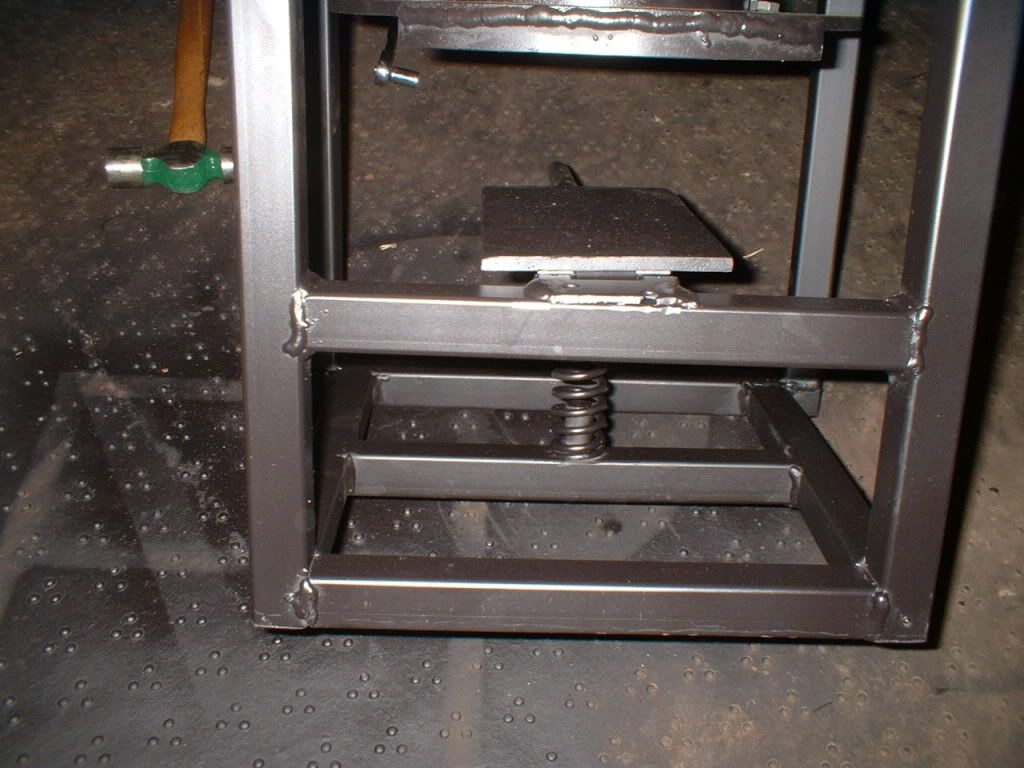
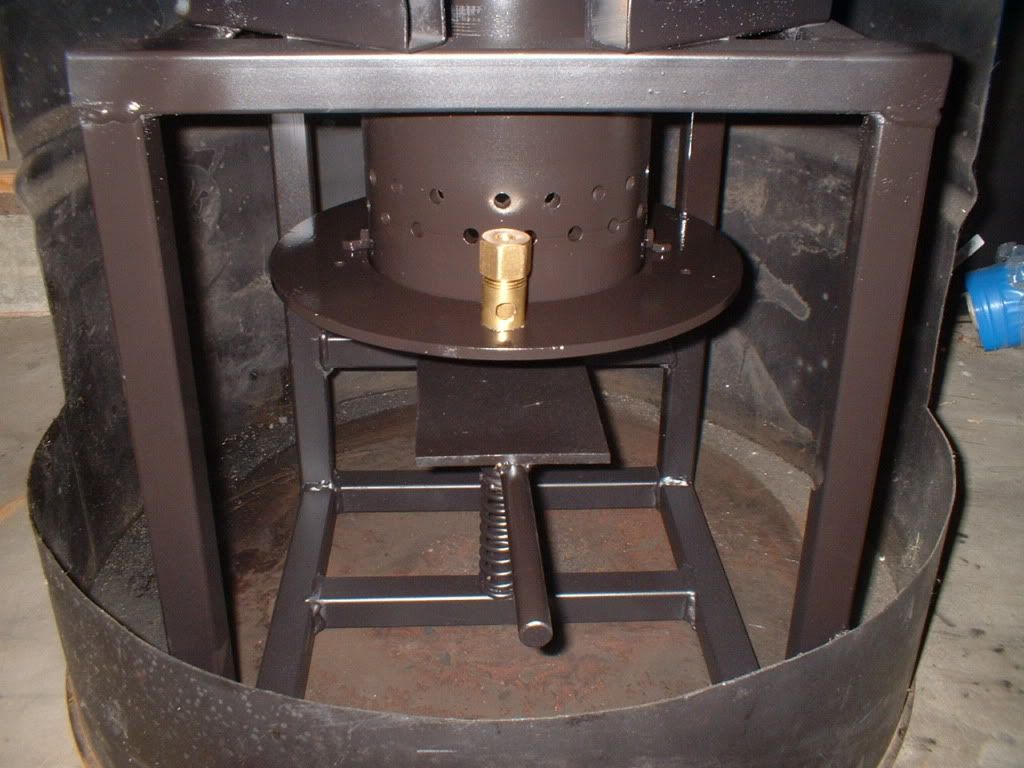
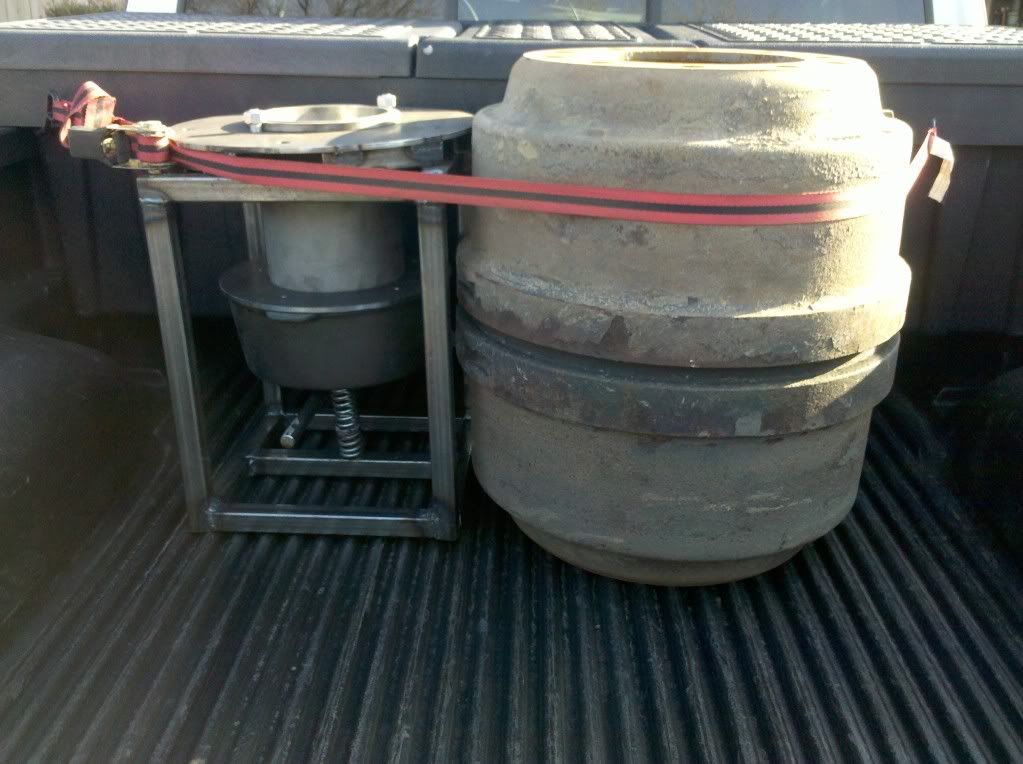
The frame has a spring and a handle to release the pot. The spring pushes directly on the bottom of a plate that the pot sets on. The plate is attached to a hinge that is welded to a cross member on the back of the frame. There are two dowels one for the bottom of the spring and one for the plate to keep it in place. The plate for the bottom drum has 1 inch spacers for bolt clearance, welded to the frame. The drums setting next to the frame are setting as they will once the frame and drums are mated.
Image

I need to widen the front of the frame; it is difficult to clear the pot. I also need to drill the cylinder for vent holes and install a baffle in the drums to deflect the draft out to the drums. Then I can weld on the draft tube, paint and install.
Dngspot
Regular Poster
 
Posts: 62
Joined: Wed May 21, 2008 1:29 pm

Postby Dngspot » Tue Dec 28, 2010 10:04 pm

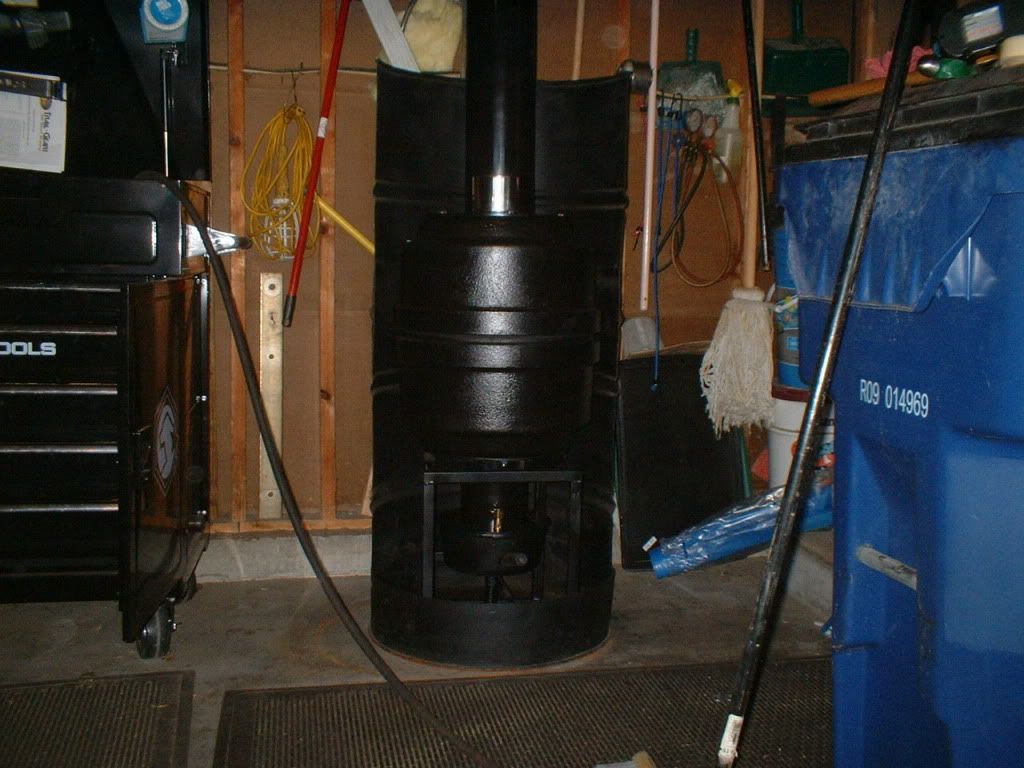
This morning I went out to a very cold garage and cut off the front of the stand. I built the front of the stand 2" wider than before. In the pic I put most of the heater together for a quick view of what the dimensions are going to be. To the right and about 15 feet behind is the Roger Sanders heater I built a couple of years ago. I ran it up to 500 degrees and could still see my breath after 2 hours. Nothing is fastened together in the pic.
The remainder to finish the project.
1. Build and fasten a couple of brackets to hold the pot lid to the cylinder.
2. Drill into the pot lid and build or assemble a connector for the oil line. I will use 3/8" copper or steel line.
3. Drill the vent holes in the cylinder.
4. Drill the pot to accept all thread for a handle.
5. Install a piece of angle iron in the pot to direct the oil to the center.
7. Test out side
8. Clean and paint then install.


Image
Dngspot
Regular Poster
 
Posts: 62
Joined: Wed May 21, 2008 1:29 pm

Postby Dngspot » Fri Dec 31, 2010 9:23 am

I did more. I welded a plate to a piece of angle iron, and then drilled 1/4" holes in the pot to bolt the angle iron assembly to. I also drilled a 1/2" hole, for all thread, to use as a handle. Then a piece of 1" pipe over the handle and a nut to keep the handle tight.

Image

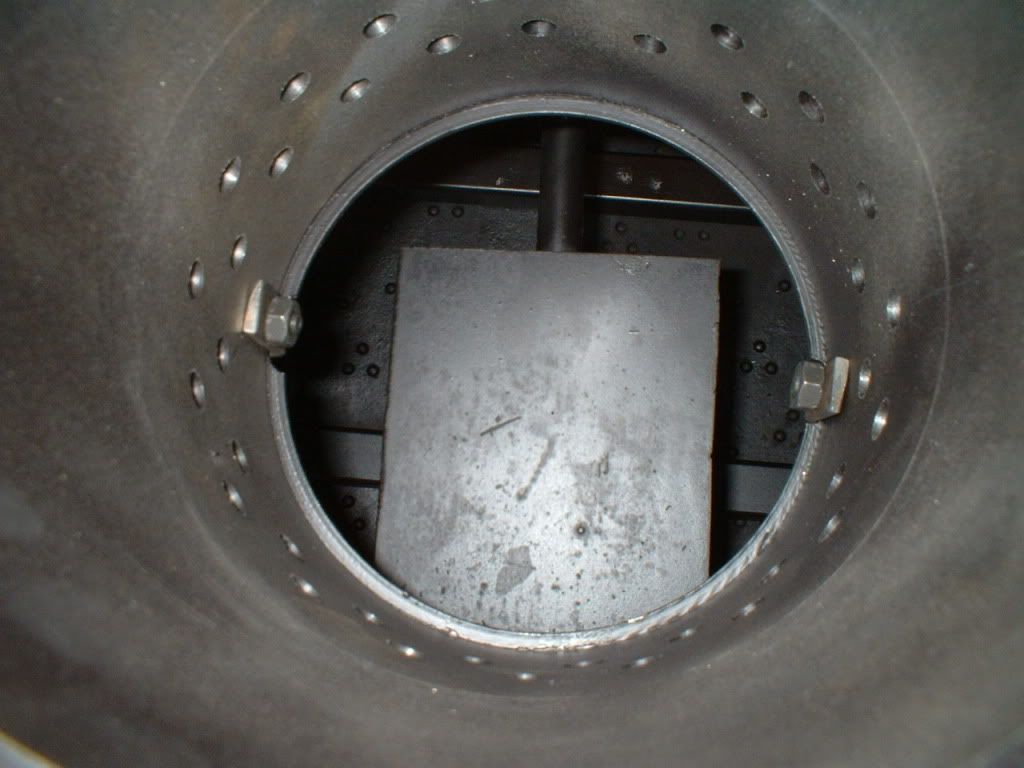
The cylinder was drilled with 38- 5/16" holes and two tabs were added. The tabs fasten to the pot lid, so when the pot is removed I do not have to fiddle with the lid.

Image

I did not post a pic of the plate the pot sits on. Again it has a spring attached to under it and uses a standard hinge.

Image

The lid for the pot was drilled and taped to 1/2" pipe. I made tube connector from a 1/2" pipe nipple and cap. The nipple and cap were drilled a 3/8 bit.

Image

I built a baffle from a piece of scrap. It hangs from the top about center of the drum assembly. The baffle is about 12" wide

Image

I painted and placed it in the old heater heat shield.

Image

I did a test run with about a quart of oil in the pot. The heater smoked out of the pot lid 1/4 inch holes and when the oil came to temp flames came from the cylinder holes. There are about three things that I can change to fix the problem. The first would be a problem with the baffle. It was a design that I thought up not one that Spike uses. The second would be, my chimney reduces to 5 inches. I may have to put in 6 inch pipe. The third would only affect the smoke, I have too much vent in the pot lid, air could be coming in from between the lid and pot. I could install temporary bolts in the vent holes and see if the lower pot continues to get enough air but does not smoke.
Dngspot
Regular Poster
 
Posts: 62
Joined: Wed May 21, 2008 1:29 pm

Postby Dngspot » Sat Jan 01, 2011 9:46 am

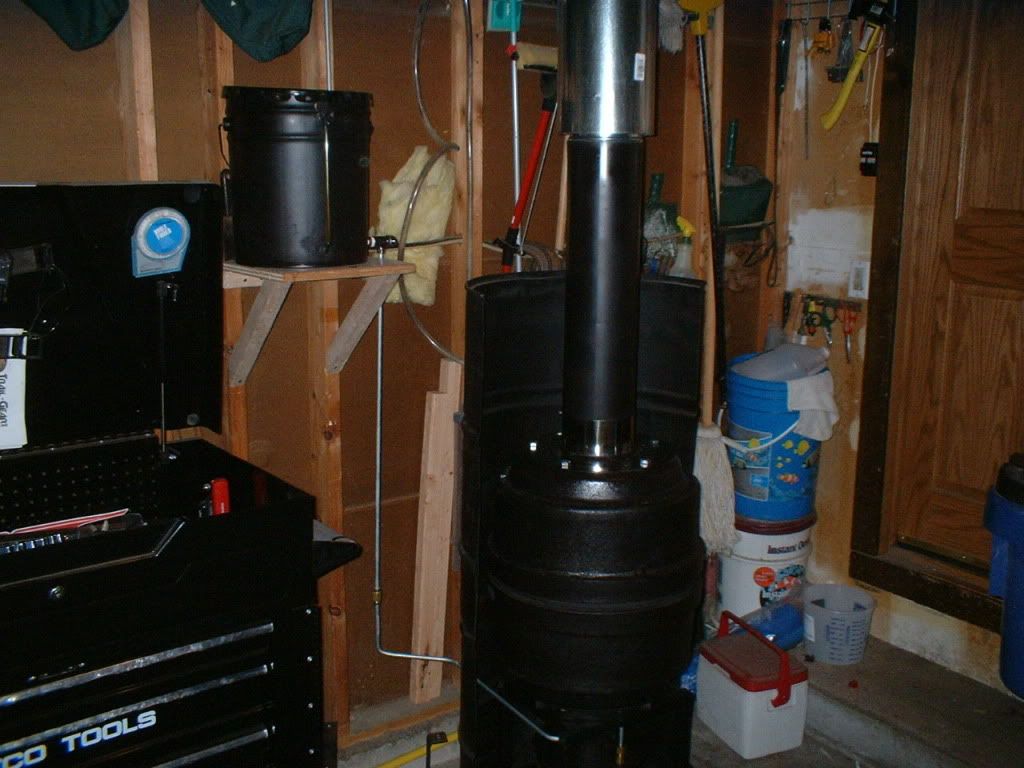
Yesterday I installed a 6 inch chimney. The thing continues to flame through the holes at high burn. I did open the pot during a low burn and noticed the flame would increase when this was done. This leads me to believe there is not enough air making it to the flame. One thing I will note, the chimney did give it a wider burning area before the flames come out of the holes in the cylinder. My next move is to drill more holes in the cylinder.
I also built a shelf for the bucket and plumbed in the oil line.

Image
Dngspot
Regular Poster
 
Posts: 62
Joined: Wed May 21, 2008 1:29 pm

Postby Dngspot » Sun Feb 13, 2011 11:31 am

I have not done anything with my heater since early January. Now that we have had a break in the weather and out of the below 0 temps I did some more today.
I think I am getting closer to a workable heater. Today I took the pot, lid and cylinder to work to do some work. I made new brackets for the cylinder and lid. I noticed when I took them apart one of the brackets was holding the cylinder above the lid about 1/16 inch. I also obtained a large piece of sand paper that had an adhesive side and stuck it to a flat bench. I then took the pot and surfaced the top edge. That sucker is flat now. I took a light around the lid and pot from the inside, and could not see light from the out side of the pot. The biggest problem was actually my spring and hinge design. I noticed when I put the freshly surfaced pot into place I could pull the handle up and the front of the pot would lift about 1/16 inch before it would make contact to the lid. I placed a 1/2 inch spacer on the front of the hinge assembly under the pot and that did the trick. I will weld a proper spacer to the hinge later.
I lit the thing and brought it to temp. It made a couple of humming noises, this is what it did before it would throw flames out the secondary burner, and there were no flames this time. This may be because of the larger holes I made in the lid for the pot air intake. I will eliminate 2 of the holes until I have the time to weld them and re-drill to ¼ inch.
The hottest I could get the thing was 380 degrees at the top plate near the flue. The drums reached 300 and the pot was hanging around 800. All temps were taken at the top burn with a 1/4 inch pool of oil in the pot.
It was tough to light and this may be due to the amount of holes in the secondary burner, as per Spike. I plan on buying bolts to fill the 50% of the holes.
The exhaust was very clear, all I could see was heat waves, no smoke during all burn levels.
Over all I think things are moving in the right direction.
Dngspot
Regular Poster
 
Posts: 62
Joined: Wed May 21, 2008 1:29 pm

Postby Jehu » Sun Feb 13, 2011 10:42 pm

Very nice. It's really interesting to see something like a heater being designed here.

Keep up the good work
User avatar
Jehu
Regular Poster
 
Posts: 519
Joined: Wed Jan 25, 2006 7:03 am
Location: Australia

Postby Chris » Tue Sep 20, 2011 2:43 pm

Wow it's funny I have been working on this design for a little while as well. I had purchased (kind of by accident) a huge hulk of a shell for a WVO heater 2 years ago but never installed the vertical babbington like I was going to. Over this past weekend I installed a drip feed heater and posted a bunch of videos of it on my new OUPower blog. Trying that out for a while :)

Anyway Dngspot yes you need a lot more holes in your secondary combustion cylinder. That should help a TON.
-Chris

OUPower.com Site Admin
User avatar
Chris
Site Admin
 
Posts: 467
Joined: Wed Jan 19, 2005 6:42 pm
Location: Lancaster, PA


Return to Building Your Own Shop Equipment

Who is online

Users browsing this forum: No registered users and 5 guests

cron